See how we exposed and prepped our original shiplap walls to make ready for paint. This was a very tedious process, but extremely rewarding.

“I wish we could find a house with original ship! Wouldn’t that be glorious?” Oh the words of a very naive woman. I did not realize how much prep work would go into exposing shiplap walls, nor did my husband. My husband wanted to make my antique farmhouse loving dreams come true, so when he pointed out the shiplap he discovered behind our paneled walls, he thought he would go down in history as the most spectacular husband ever. It was a week into our shiplap discovery when we realized how far up shit creek we were, definitely without a paddle and almost without a boat. At this point we were in it for the long hall! Read below for how to expose and prep shiplap walls in your home. Learn from us on what did and didn’t work.
the Exposing and prep work begins
Behind this lovely 1970’s wood paneling was a plethora of original shiplap. We discovered every wall on the old side of our house had it. You can see the blog I wrote HERE about us finding the shiplap.

In order to expose the shiplap we had to remove the paneling first. Each panel was nailed and glued very well into place. The people who installed it definitely did not want it ever coming down.
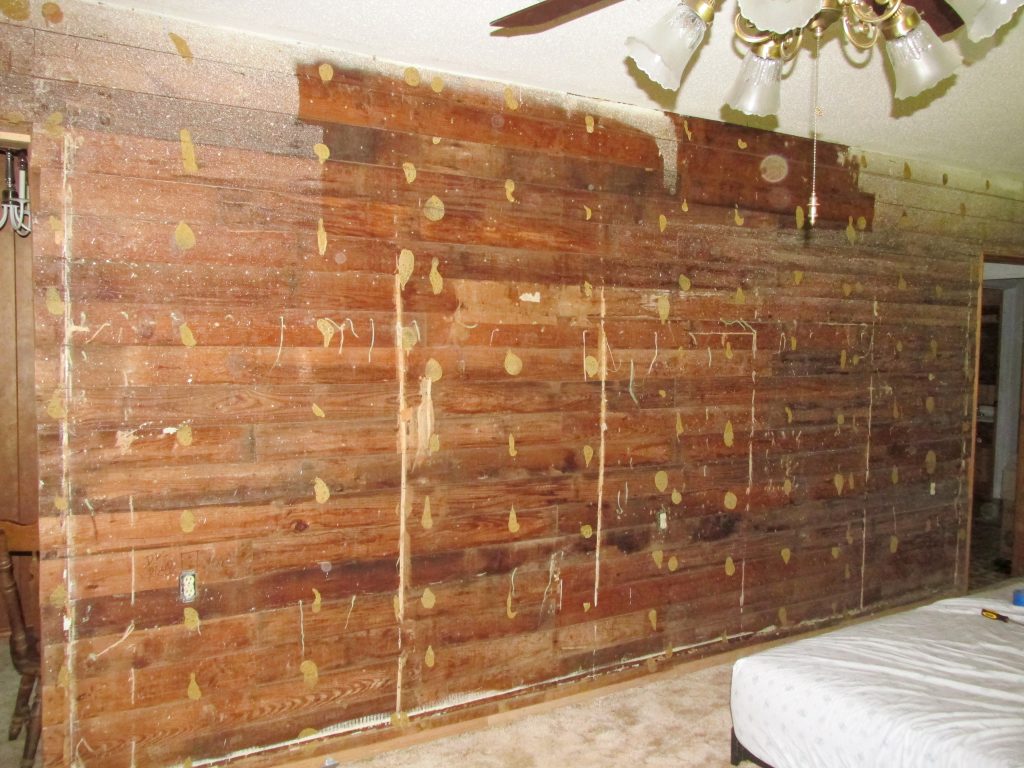
First we had to remove all the crown molding and trim. Then we started prying the seams apart where the panels came together. We found remnants of old cheese cloth and tack nails, which leads us to believe there was wallpaper up at some point. The amount of tack nails still in the wall was quite a slight. There was a ton!

REMOVING the Glue
The next step was figuring out what was the best way to remove the glue and bits from the wall. We knew we needed to remove all the nails left from the panels that were sticking out from the wall. We started going section by section with a flash light pulling the nails.

After we thought we removed all nails, we used a belt sander we purchased from Harbor Freight with 80 and 50 grit sandpaper to sand the walls. We were hoping this would sand down the glue, grab the strings of cheese cloth and level some of the uneven shiplap boards. Let me let you in on a secret….this step was a big time fail!


The shiplap boards ended up being so uneven that the belt sander would only touch the highest points. The 80 grit sandpaper was no match for the three decade old glue that held the wood panels in place. We switched to 50 grit and that still did little to nothing.
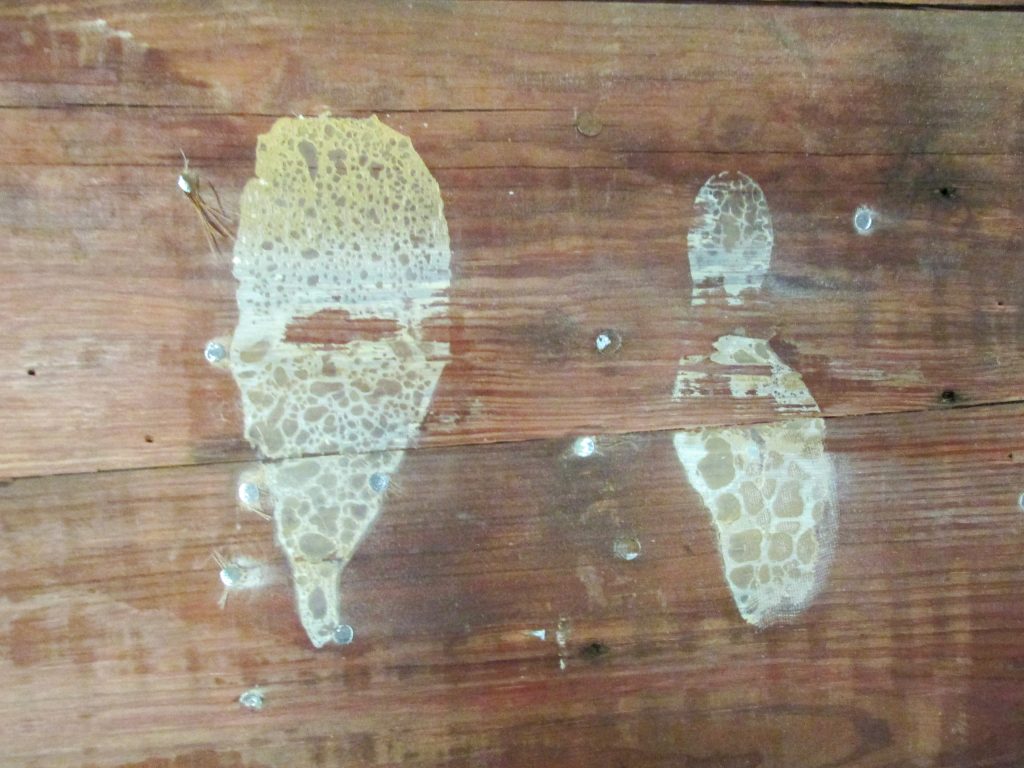
On top of the sandpaper having little to no impact, the belts kept getting caught on the tack nails that still remained. Even though they looked as if they were laying flat, those little suckers would grab ahold of the sanding belts and shred them in half.

We needed to figure something else out since our first attempt at sanding was a big fail. After a bit of brainstorming, my husband thought of heating up the glue with a heat gun and scrapping it off. We went back to Harbor Freight to buy a heat gun, grabbed our putty knives and crossed out fingers!


Hallelujah! This technique worked like a charm. The glue heated up perfectly and plopped off with ease. The little pieces of cloth that were stick under the glue and nails burnt up and fell right off. The smell for this process was horrible though.
More very tedious Prep work…Nail removal Time
Since the stubborn glue was removed, we had one last step to do before we could sand. Now was time to remove all the little tack nails that covered the walls. There was an obscene amount too!
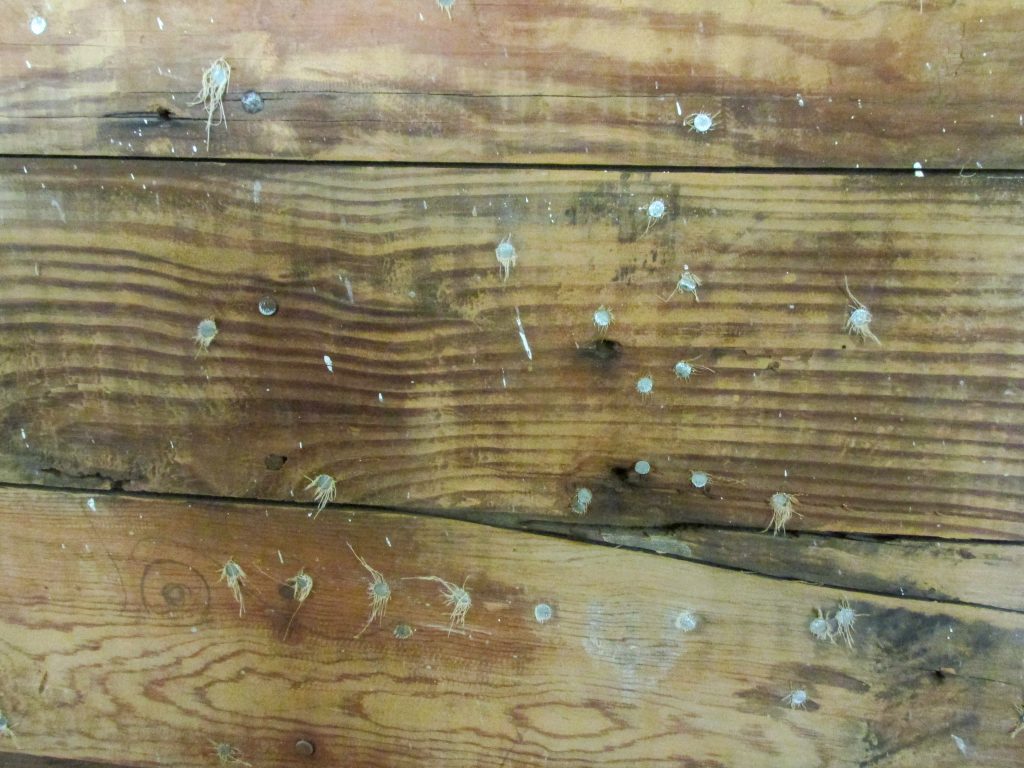
We bought a nail punch kit, which did absolutely nothing since the heads of the nails were too large to be sunk into the wood. We could not find small enough nail puller that would fit under the nail heads either. So the only doable solution was to use a thin flat head screw driver and needle nose pliers.

From our room alone I removed one plum full venti sized Starbucks iced coffee cup! My hands ached but I did it. I wasn’t able to removal all the nails, however, I got the majority of them.
Finally… Sanding the exposed shiplap walls
Now that the glue and nails were gone we could sand and make pretty the shiplap. We used a palm and an orbital sander with 60 grit.

This was a definite workout for the arms. It was messy and I got some kind of infection in my sinuses, but by golly it got done! Later we found a way to hook the shop vac to the sanders for a much cleaner sanding process.


THE final Step
Lastly it was time to fill all the millions of nail holes that were in the walls. We used this DAP Plastic Wood Filler.

I highly recommend this wood filler. It is easy to use, dries quick and sands smooth.

Each of us took an area of wall and started to fill in the holes. There were a few knot holes in the shiplap that we had to first plug before doing a final sand, but I will write another entire step by step post about that.

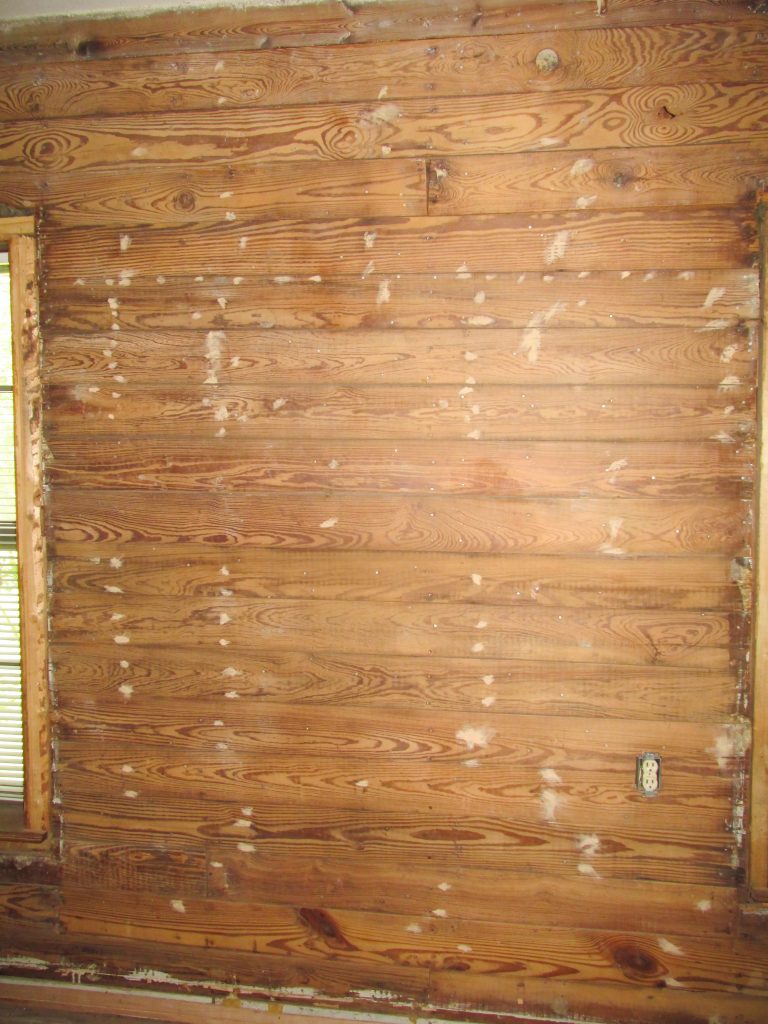
After filling the holes, then sanding, we could see how beautiful these original walls were. All the time and effort was very well worth it.

THAT’S A WRAP ON HOW TO EXPOSE AND PREP SHIPLAP WALLS! Or at least how we did it.
Check out this post to see how we found oringinal shiplap in our old farmhouse
Want a Yummy Bacon Guacamole Recipe? Click Here
Follow Country Life Charm Blog’s Pinterest for more!

Lots of work, but looks great!
Thanks!
Wow that must have been a lot of work, but I’m sure well worth it in the end! Your walls look amazing! Thanks for the inspiration!
Thank you so much!
Wow! So much work, but it looks like it was worth it in the end. I love how they glued the paneling up which is fake just to cover up actual wood. Boy have times changed! We are having a similar issue, but with glued downed 70’s laminate flooring (who ever installed it also never wanted it to be removed). Good to know that the sandpaper didn’t work as we were thinking of trying one out to get the glue off of our subfloor.
The 70s seemed to be the era of cover up. Ha! I would definitely say heat is the way to go. It takes far less elbow grease using a heat gun and getting that horrible glue to soften.
wow…you really poured your heart into this project. The end results look great…really brings in that rustic country vibe. Love!
Thank you! There’s a lot left to do. It’s all coming along nicely though.
Wow, love the pics. This is the first time I have seen them & all the work you did. I have seen the end results each time & it was great! So, to actually see the step by step hard work you all put into it, “You” have the right to be Proud!!
Beautiful!
Love You All
Mom
Thank you very much! We are really happy with how it turned out. The vision in our heads really came to life.
Help. How did you plug the bigger knot holes? We have a ton and I want to avoid perfect circle patches and retain the original shape of the knots if possible. Apart from hand carving the shape is there a way to plug/wood fill the spaces for a more natural texture/look when finished? I can’t find anything online apart from fake shiplap.
Hi Janelle! Our big knot holes were already circular. We were able to easily make plugs to go into each hole, ultimately making the knot hole disappear once the wall was painted. We only had a few knot holes that were irregular shaped and honestly I just left them as is. They’re still hanging out, open and adding to the imperfect old vibe I was seeking.
I’m actually going to go and finally make my post on how we plugged our knot holes. Thanks for the motivation! I wasn’t sure if anyone would want to see that process. Hopefully you see it and it helps.
That look awesome I was wondering do you know anybody that’s looking for shiplap I have an old house that 100 years old I’m tearing down and I’m saving the wood for sale